Showing posts with label recipe. Show all posts

Monday, January 9, 2012

Curried Carrot Soup

 I have recently learned how easy it is to make vegetable stock from scratch.

All vegetables, water and a few choice spice/herbs.  Not a single speck of salt added.   It totally beats any stock cube/powder or liquid stock you can buy - even the salt reduced ones still have a lot of unecessary salt in them.

I made up a batch of vegetable stock and made a sweet potato & thyme soup which is a delight to taste.   I then had a half litre of stock leftover.   I used it last night to make this curried carrot soup which rocked a party in my mouth like I couldn't believe.   I ate it too quickly to take a photo!


Curried Carrot Soup
  • 20g butter
  • 1 small onion diced finely
  • 1 garlic clove chopped finely
  • 1 tsp garam masala
  • 1 tsp ground cumin
  • 1/2 tsp nutmeg
  • 4 med carrots chopped (do not peel)
  • 2 cups vegetable stock
  • 3/4 cup water
  • a splash of white wine vinegar
  • a dollop of sour cream
Melt the butter in a saucepan.   Fry the onion and clove for a minute in the butter.  Add the spices and stir until the onion has softened and the mixture is fragrant.  Add the carrots, stock, water and vinegar.   Bring to the boil then reduce the heat and simmer over medium heat until the carrots have softened.  Puree the mixture then serve with the sour cream stirred through. 

Serves 2
5 - 10 min preparation
10 - 20 min cooking time
 

Wednesday, July 13, 2011

What to make with just 5 strawberries

I was thrilled to see I had strawberries in my latest food connect box.  Then came sadness that there were only 5 of them.   Though smooshing a plain strawberry in the mouth is one of life's great pleasures, I wanted to use all five together in a worthwhile kind of way - enough to help out with a meal. 

What could I do with 5 strawberries that would make them worthwhile?

Then I was reminded of the breakfast episode of River Cottage Everyday where Hughie makes a breakfast thickie as a quick and tasty option to include oats in breakfast - not as porridge!


In go the strawberries..... some homemade yogurt with the last scrapings of my mulberry ice-cream and a generous handful of rolled oats.   Cover the lot with milk.

In goes the hand blender.....

And in a few short minutes I have a delicious breakfast thickie!

Sunday, June 5, 2011

Kitchen Sunday

I've instigated, as part of the recovery from 'The Great Slump' at least one 'at home' weekend day in a fortnight.

I think after today's raging success I will also be blocking my calendar once a month for 'Kitchen Sunday'.


Kitchen Sunday is spending a whole day in the kitchen cooking and baking food that will mostly be frozen or put away for use in the following month.


On the Menu for This Kitchen Sunday

Pumpkin Soup 
Made 4 services.  I ate one for lunch (gotta reward yourself for the effort involved in Kitchen Sundays!) and put the other three in the freezer for meals.

3 frozen meals. 


Pumpkin Gnocchi
Oh!  I had forgotten the previous lesson about how fiddly and annoying making gnocchi is!  But nevermind, now I have 4 meals frozen.


4 frozen meals.


Beef Casserole
This is still cooking in the slow cooker.   This casserole is filled with tasty things like, swedes, potatoes, onions, carrots, celery, fresh thyme, diced beef and mixed soup beans.  My bet is this will make probably 6 meals to freeze.


6 frozen meals.


Spiced Pumpkin seeds
This is really a case of waste-not-want-not.  The seeds were saved from the butternut pumpkin used for the soup and gnocchi.   First I washed off all the gunk, boiled them for 5 minutes then tossed them in a mix of spices and baked them while preheating the oven for roasting the gnochi pumpkin.


Snack in the pantry. 


1 Loaf Bread - lunches for the week.
1L yogurt - lunches for the week.
Sweet Spiced Cashew Biscotti - for lunches.


 Tuna, Silverbeet & Chickpea Creamy Pasta
This self created recipe made 3 very generous meals.  I ate one tonight, saved one for tommorrow's dinner and froze one.


1 saved and 1 frozen meal.


  • 250g dried pasta
  • 10g butter
  • 1tsp olive oil
  • 5 grape tomatoes, sliced
  • 2 stems silverbeet, leaves sliced/shreded thinly, stems sliced thickly
  • 1/3 cup of reconstituted dried chickpeas
  • 300g canned tuna, drained and flaked.
  • 1 rounded tsp of wholeseed mustard
  • 100ml cream
  • 1/4 cup sour cream
  • 1/4 cup grated parmesan cheese
Boil the water for pasta while preparing vegetables.   Add pasta to boiling water and cook until al dente.  Drain and add to sauce.

For sauce - melt butter and oil in a frypan.   Add silverbeet stems and tomatoes.  Fry these for a few minutes then add the silverbeet leaves and chickpeas and mustard seeds.   Fry for a further few minutes.  Add tuna, cream and sour cream.  Stir through well and reduce heat.  Once the sauce is almost warmed entirely, add parmesan cheese, stir through.

 (Note the chickpeas were dried and I reconstituted them by soaking them in boiling water twice during the day.  They retained more flavour and texture than chickpeas from a can.  You could use canned chickpeas however I think that the firmness of the chickpeas really add to the meal and would recommend trying reconstituted ones if you can!)


Anyway folks,  I'm still in progress for Kitchen Sunday - I have yet to finish my biscotti!  I'll add photos once they're done too!

Friday, January 14, 2011

Project Use-Up-The-Ham Part 1

This year my family had a large Christmas dinner with all of my Dad's side of the family there as well as all my brothers and sisters, their spouses and children. It ended up being close to 30 people... thank goodness it wasn't hosted at my tiny house!

This year the responsibility of buying the Christmas Ham fell to me, a task I didn't take lightly. Knowing the number of people due to come and the healthy appetite of the clan I bought a decent sized smoked ham leg for $60.

As is usual with Christmas dinners there was a lot of leftovers. My ham was returned to me with less than a quarter of it gone. Enter Project Use-Up-The-Ham!


PROJECT USE-UP-THE-HAM

Objective:
To use up the entire remainder of the Christmas ham in exciting and different ways (i.e. not ham sandwiches every day for a month).

Important Information:
Ham will keep for some time given it is stored correctly. One of the best ways to store ham is in a ham bag (a.k.a a calico bag) which has been soaked in a mixture of 1L of water and a cup of white vinegar. The vinegar acts as an antiseptic while the soaked bag stops the ham from drying out.

The ham bag needs to be re-soaked every few days.

Progress so far:

To date the ham has been used for a number of meals including:
  • ham and salad rolls.
  • homemade pizza with ham, capsicum, onion and tomato toppings.
  • diced ham included in a bento box for lunch
  • other, more exciting, options below.


Boxing Day Soup


Don't be fooled by the curious name. It is pretty much just a variation on pea and ham soup.

It uses:
  • whatever mix of pulses and grains are in your pantry in the place of the split green peas. (I had split green peas, some red lentils and brown rice).
  • whatever soup vegetables such as carrots, celery, leek, turnip, swede etc. you have available.
  • Salt, pepper, a bay leaf and some dried herbs. (I used whole peppercorns, thyme and basil.) either vegetable or chicken stock.
  • Smoked ham diced in the stead of the usual ham bone scraps.

I put all of these ingredients cold into the slow cooker and let it stink my house up for half a day. And there you have Boxing Day Soup.


Italian Omelette
(adjusted from a Family Circle Recipe- Pasta Cookbook)


Bad photo of excellent food. Italian Omelette went so quickly this is the only shot I got of it.

Again, this recipe has a deceiving name. This is nothing like a traditional omelette. It is closer to a frittata.

  • 2 tab olive oil
  • 1 onion finely chopped
  • 125g ham diced finely
  • 4 eggs
  • 1/4 cup milk
  • salt and freshly ground pepper to taste
  • 2 cups cooked spiral (or other short) pasta.
  • 1/4 cup grated parmesan
  • 1/4 cup grated gruyere cheese
  • 1 tab fresh basil chopped
  • 1/4 cup cheddar cheese.
Heat half the oil in a frypan. Add onion and cook over low heat until soft.
Add the ham and cook over low heat for a few minutes. Transfer to a plate.

In a bowl, whisk eggs, milk, s&p together. Add the cooked pasta, parmesan and gruyere cheese, herbs and onion/ham mixture.
Return the omelette mixture to the same fry-pan, top with cheddar cheese and cook over low to medium heat until it has started to set. Put the fry-pan under a grill to set the top of the omelette.


The mix of the three cheeses really made this dish sing. The photo doesn't do it justice at all. Dan and I both went back for seconds and I ended up with no leftovers!


Honeyed Ham For Breakfast


Honeyed ham is, in one word, delicious.
Honeyed ham for breakfast is just plain decadent.

Cut off chunks of ham.
Heat either olive oil or butter in a saucepan.
Add the ham and a generous dollop or two of honey.
Fry the ham in the honey mixture until golden brown.


Best served with toast and egg with a cup of tea on the side. Oh yeah!


Ham and Vegie Fritters


When my mum heard of Project Use-Up-The-Ham she offered her suggestion of fritters. This is a family favorite to make use of leftover roast and I can't count the number of times I had fritters for dinner as a child.

  • 1 egg
  • 1 cup self-raising flour
  • 1 cup milk
  • 1 onion finely chopped
  • pinch salt
  • 125g ham diced finely
  • 1/3 cup peas
  • 1/3 cup corn kernals
  • oil for frying.
In a bowl, beat the egg and milk. Stir in all other ingredients.
In a frypan, heat olive or vegetable oil over high heat. Once sufficiently heated, drop two to three tablespoons of the fritter mixture into the oil. Fry each side until golden.

It is imperative that these are served with an emoticon (smiley face etc.) of tomato sauce.


I failed at frying the first batch because I didn't have the temperature high enough or wait until the oil was ready before adding the batter to the frypan. My second batch was more successful. Remember that you are frying these.... they should be golden and crispy and not the consistency of pancakes (though they taste pretty good that way too!)


End report:
With a large amount of the ham now gone I am still looking for ways to use up the last of it.

Suggestions so far have been a ham-based carbonara and fried rice.

Does anyone have any other suggestions for completing Project Use-Up-The-Ham?

Wednesday, January 5, 2011

Mulberry Ice Cream

Ice cream is exquisite. What a pity it isn't illegal. Voltaire


The mulberries plucked from the tree back in Spring were still sitting frozen, unused. Indecision about whether to make jam, cordial, a dessert syrup or some other delightful delicacy from my most treasured harvest had me at a standstill on using them at all.

On the 1 January 2011 I made my favourite choc-chip biscuit recipe which calls for a few tablespoons of condensed milk. That gave me an almost an entire can of condensed milk leftovers which I needed to use up.

A friend had made home-made ice cream for her New Years party using condensed milk so I hunted down a recipe (www.taste.com.au forums), girded my loins and went in for an adventure in ice cream making.


Mulberry Ice Cream

400ml condensed milk
300ml thickened cream
1 tsp vanilla essence
3 eggs separated
1kg mulberries, stalks removed.

Beat the condensed milk, essence and egg yolks for roughly 3 minutes, or until light and fluffy.
Beat the egg whites in a seperate bowl until firm peaks can be made.
Beat the thickened cream in another bowl until thick.
Puree the mulberries.

Condensed milk mixture, mulberry puree, egg whites and whipped cream.

Fold the egg whites, thickened cream and mulberry puree into the condensed milk mixture. If desired, beat with a hand mixer for a few more minutes before putting in a suitable container for freezing.


Notes
  • handmade ice cream will be harder than machine made/store bought ice cream..... but just as tasty!
  • makes just short of 2L of ice-cream.


Sunday, April 18, 2010

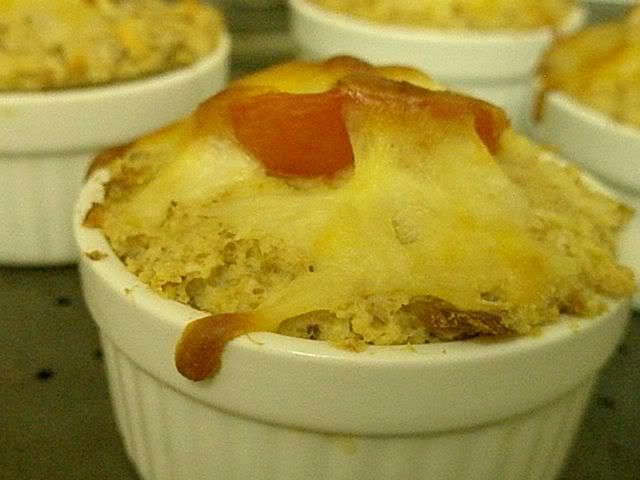
Tuna and Potato Pot Pie

I originally intended to make my mum's 'fish cakes' recipe but found I had no mayonnaise in the fridge. Instead I boiled and mashed up potato to help bring the tuna mixture together into patties. At the point of cooking them I decided that I wasn't keen on frying in oil and butter but would rather bake them for a healthier finish.

A new recipe was created!


Tuna & Potato Pot Pie


  • 185g can of tuna in brine, drained
  • 3 medium potatoes, peeled & chopped
  • splash milk
  • 1/2 tsp butter
  • 1/2 onion chopped finely
  • 1 egg, lightly beaten
  • splash lime juice (lemon juice could be substutited)
  • 3/4 cup breadcrumbs
  • 1 tomato, sliced
  • 1/2 cup cheese

Preheat oven to 180 degrees (c).
Boil or steam potatoes until soft. Mash the potato with the milk and butter until of a smooth consistency.
Mix tuna, potato, onion, egg, breadcrumbs and lime juice togther in a bowl. Combine well.
Spoon mixture into ramkins (4 - 5 depending on size of your ramekins).
Place a tomato slice on top of each pie and top with a sprinkling of cheese.
Put ramekins on a flat cookie tray and bake in the oven until the cheese is browned.

Note:
If eaten fresh from the oven, keep in the ramekin. I refrigerated leftoever pies overnight. The next day I was able to pop them out of the ramekins to reheat.

Thursday, March 18, 2010

Smoke me a kipper! I'll be back for breakfast!

Every so often while at the supermarket I get the urge to buy something completely out of the ordinary. Sometimes this leads to unpleasant results like the time I bought some odd, spongey fungus from a asian-mart which I used in a doomed stir-fry I dubbed "the bowel shaker" .... let's not go there.

But other times I stumble across something that finds a home in my diet.

This time that something was tinned kippers.

I was doing my usual shopping experience, extended by careful perusal of product labels, prices etc. I was intending to buy some tuna but was feeling dissatisfied by the options. Temptingly close to the tuna was canned salmon. I'm not one for salmon flavour but a book Rhys had shown me recently said that salmon was a superfood. I knew it to be packed with omega 3 fatty acids and very good for me but I just wasn't feeling the salmon love.

In frustration my eyes strayed above the salmon to some of the more unusual canned options.

Canned Sardines. I remember my grandma making us sardine sandwiches when I was a little girl but the idea of chomping on tiny bones doesn't appeal. Canned mussels. Ewwww. Canned Kippers. Whut?!!

Then of course my brain linked to the one thing that was connected to kippers in my life thus far, Ace Rimmer from the BBC comedy, Red Dwarf, boldly saying "Smoke me a kipper skipper! I'll be back for breakfast!"

From that moment I was without choice. I HAD to buy the kippers.

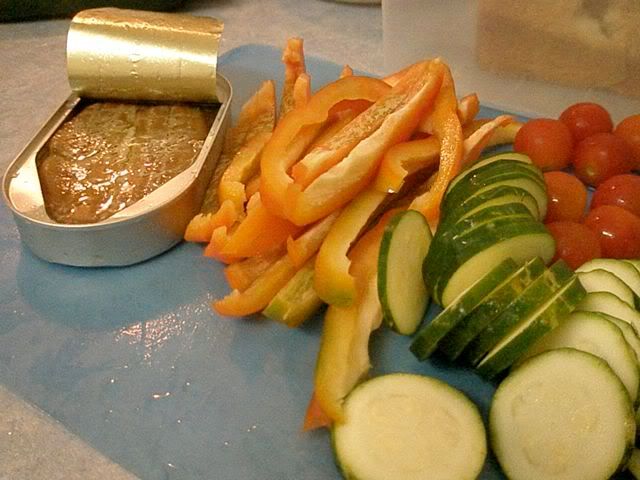
But once I got them home I felt at a loss on how to use them. John West, the producer of my tinned kipper, linked to another foodie site that had a recipe for some kind of kipper and pasta salad. Certain vital ingredients were missing so I played with what I had.

Pasta and Kipper Salad


  • 1 can tinned kippers
  • 1 capsicum, sliced
  • 1 zucchini, sliced
  • 1 handful cherry tomatoes
  • 250g pasta (spirals)
Put the pasta on to boil. Drain and set aside once al dente.
Meanwhile heat some butter or olive oil in a frypan. Fry the capsicum, zucchini and tomatoes. Once the vegetables have softened set them aside.
Add the kipper and oil to the pan. Heat over low heat, being careful to not break up the flesh too much.
Gently mix pasta, vegetables and kipper in a serving bowl and eat while warm.


Kippers differ from tuna and salmon by the smokey smell and flavour of the fish flesh. I really enjoyed it as a tinned fish (and my kittens went absolutely nuts over the few leftover tidbits) but the smell is powerful and now I can smell nothing BUT kippers as I walk into my kitchen. :/

Tuesday, March 16, 2010

My positively favourite choc-chip recipe


  • 180 g butter or margarine
  • 1/3 cup castor sugar
  • 4 tab condensed milk
  • 1 1/2 cups SR flour
  • pinch salt
  • 200 - 250g choc chips (or chopped chocolate block)
  • 1/2 cup chopped nuts (optional)

Preheat the oven to moderate (180 degrees celcius) and grease baking trays.
Cream the butter, sugar and condensed milk.
Fold in flour, salt, chocolate and nuts.
Roll into balls and place on trays about 10cm apart. They will spread while baking!
Flatten balls slightly.
Bake in the moderate oven for 15 min, turning the tray at half time to ensure even baking.

Saturday, January 2, 2010

Polenta Mash - the Lazy Comfort Food

Last night's dinner fare was tasty steak with boiled vegetables and a red wine & cranberry jelly sauce. Delicious! However I went a bit overboard on the veges and made almost double what I needed. So this evening I had leftover vegetables and not much else as the fridge is on the lean side until I hit the markets and do grocery shopping tomorrow. One rubbery carrot, a few eggs, a tub of yogurt and some frozen potato chips does not a meal make. I was at a loss about what to do for tonight's meal.

A blogger I read once made an entry about 'using up' those supplies that sit in the pantry, being creative on how to cook what you have rather than buying more. This is useful not only for ensuring that you use pantry supplies before their due date, reducing food waste, but also for when the supermarkets have already closed for the day.

With this in mind I eyeballed the dried supplies in my pantry for inspiration.

Barley seeds. Nup. Rice... *pull a face* Not tonight. Tuna - I'd make sushi but for the lack of mayonaise and nori paper. Tuna mornay? No pasta. *sad face* Tapioca. WTF? Polenta... hmmm.... polenta!

And that's how Cheesy, Creamy Polenta Vege Mash came to be on my dinner plate tonight. An idea born of desperation and laziness it became a very tasty reality and on my list of comfort foods to cook when in a pinch.

1/2 L of hot water and 1/4 L of chicken stock are boiled together in a saucepan. 160g of polenta is added to the boiling liquid in a steady stream, stirring it through immediately. 1 cup of boiled vegetables are added along with 1/4 - 1/2 cup of grated cheese and a generous splash of low fat cream. As the polenta thickens, remove it from the heat. Serve and eat while deliciously hot.

The lazy comfort food when the fridge is empty and the pantry isn't offering up any gourmet feasts.

Sunday, July 19, 2009

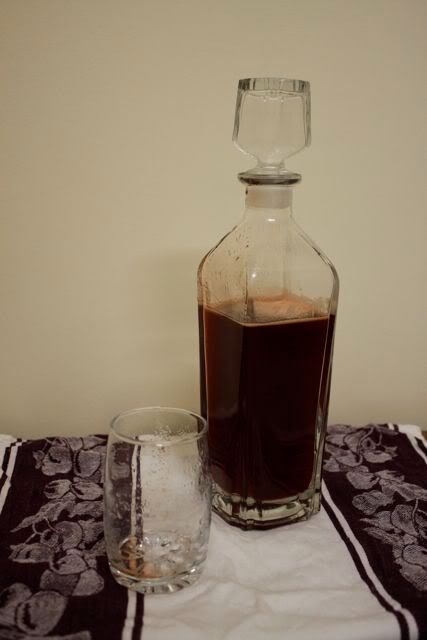
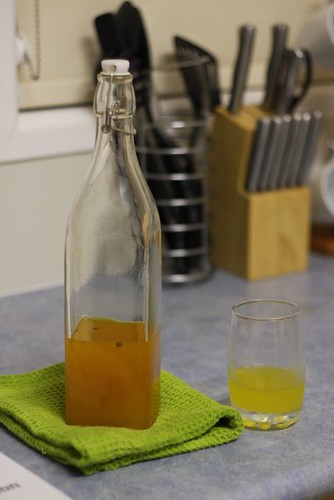
Strawberry & Cardamom Cordial

One of my (numerous) hobbies is historical reenactment. This upcomming weekend will find me, dressed in pretty Regency clothes, at the only fort in Brisbane. Two days on the edge of the cold Brisbane bay in Winter deserves some good food so I set about finding recipes from the early 19th century to make and take.

In Regency (Jane Austen) times, cordial was a term used for a sweetened liquid given to invalids. What we refer to as cordial in Australia today was called 'waters'. So the recipe I made would be called:
Strawberry & Cardamom Waters
  • 2 cups water
  • 2 cups castor sugar
  • 2 tab lemon juice
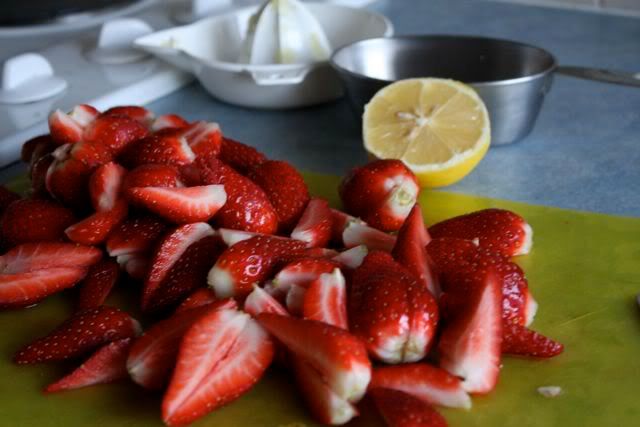
  • 2 x 250g punnets of strawberries
  • 1/4 tsp cardamom seeds

Hull and halve the strawberries. (Mine were large suckers so I quartered them.)

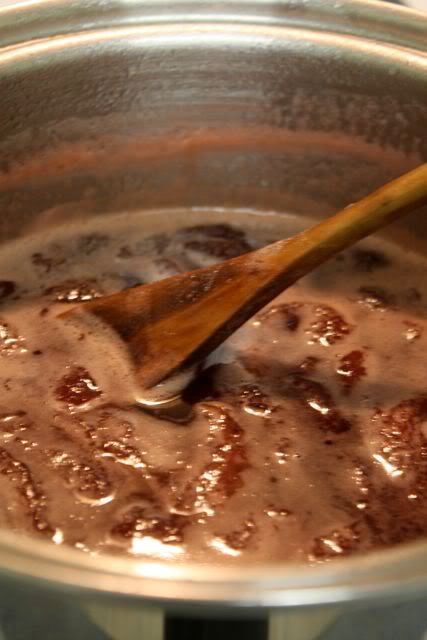
In a saucepan stir the water, castor sugar and fresh lemon juice over low heat until sugar is dissolved. Raise the heat and simmer the liquid until it has reduced to a light syrup.


Add the strawberries and dried cardamom pods (I put mine in a tea caddy so they wouldn't be hard to remove from the strawberry pulp at the end). Simmer this for about 20 minutes.

Let cool for another 20 - 30 min.

Discard the cardamom seeds. Strain all syrup from the liquid through a fine sieve. (This may take some time!) Bottle in a sterilised bottle and voila! Delicious but very rich cordial.

Saturday, June 6, 2009

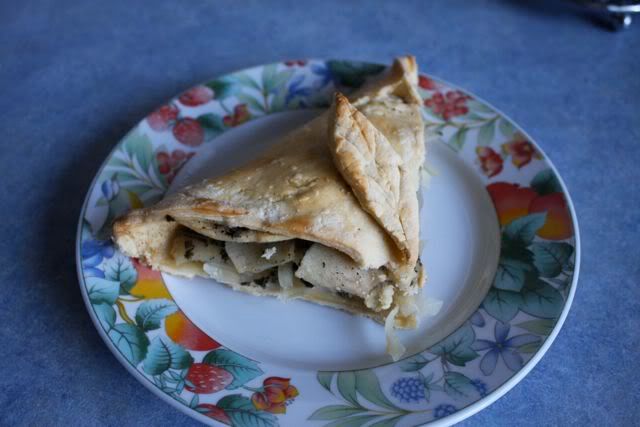
Onion, Apple and Sage Pie

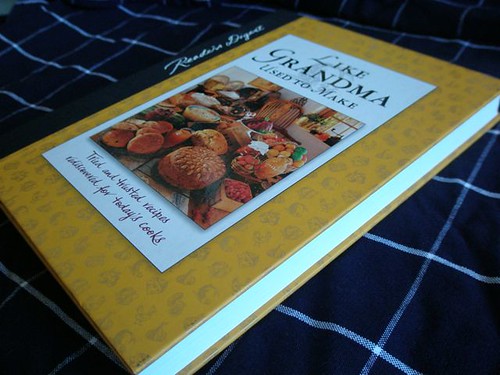
Due to popular demand (on facebook) for this recipe, here it is! The recipe for Onion, Apple and Sage Pie - adapted from the cookbook "Like Grandma Used to Make" by Readers Digest. (I can't recommend this book enough!)


Onion, Apple and Sage Pie
  • 3 small onions, sliced thinly
  • 2-3 small apples, peeled, cored, sliced thinly
  • 2 tsp fresh sage, chopped finely
  • 1/4 tsp of salt
  • 1/4 tsp pepper
  • 2 cups flour
  • 125g butter, softened
  • 1 pinch salt
  • 3 - 4 tab chilled water
  • a little milk for glazing.

For the pastry:
(or you could 'cheat' and use a sheet of pre-packaged shortcrust pastry.)

In a bowl rub the butter into the flour. Add enough cold water until a very stiff dough is formed. Knead on a floured bench for a minute until smooth. Cover in plastic wrap and chill for 20 - 30 min.

For the pie:
Preheat the oven to 220 degrees (celcius).

Roll the chilled pastry dough out to a square slightly larger than 30cm x 30cm. Trim the edges to neaten the square. I found it useful at this point to gently mark the area I wanted to put the pie fillings in - a smaller square rotated45 degrees and fitted inside the pastry square like a diamond, so that the four corners of the pastry will act like flaps.

Lay the pastry down on a baking tray. Place down a layer of half the onion slices. Top this with a layer of half the apple slices. Sprinkle half of the sage across the apple then dust with half of the mixed salt and pepper. Place a layer of the remaining onion, followed by a layer of the remaining apple slices. Again, top with the remaining sage, salt and pepper.

NOTE: The recipe in the book called for 4 tab sour cream to be put ontop at this point but I had no cream or sour cream in the fridge and this called for the pie to be chilled for another half hour.. and I was hungry. So I left it out. If anyone tries this recipe with the cream I'd love to know how it works out!

Brush the edge of the pastry with milk. Fold two of the corner flaps up over the filling and press together -they should overlap slightly. Fold the other two corner flaps up to meet the other flaps and press together. You may find you have a bit too much filling - gently pull out what you need to so the flaps of the pie can all be folded up neatly.

Use the excess trimmed off pastry to make decorations for the top of the pie (I made leaves and little flower shape. Brush the whole top of the pie with the milk.

Put in the oven and bake until the top of the pie is golden brown.

Friday, May 15, 2009

Caraway - the forgotten sweet spice

I did a search on www.taste.com.au using the keyword 'carraway' - 0 search results.

Then I realised I was misspelling caraway.

A new search, this time using the correct spelling, 'caraway' - 3 pages of search results.
A search for recipes using caraway's next door neighbor 'cinnamon' - 59 pages of search results.

Poor caraway! So unloved!

Perhaps it is neglected so because it feels safer to bake/cook with those spices we are familiar with or maybe because people don't like to eat things with the little seedpods that get caught in the mouth.

Caraway seeds dotted in biscuit dough

Whatever the reason, most people I know wouldn't even recognise caraway as a spice. (My fiance thought it was just the name of a street near his work.) Which is a shame, because caraway has a sweet scent and flavour somewhat like anise but not as strong or pungent. I also love the way the little seeds look, so much so that I was inspired to take a photo of the dough rolled out, with shapely caraway seeds prominant.

Yesterday, on a well-earned day off from work, I decided to do some more therapeudic baking. I'd made a caraway biscuit recipe from Cookshelf Baking by Emma Patmore before but was not satisfied with the recipe. The dough didn't come together at all and the cooking time was too short, leaving the cookies unpleasantly doughy. So I did some tweaking of ingredients and baking time and came up with the following:


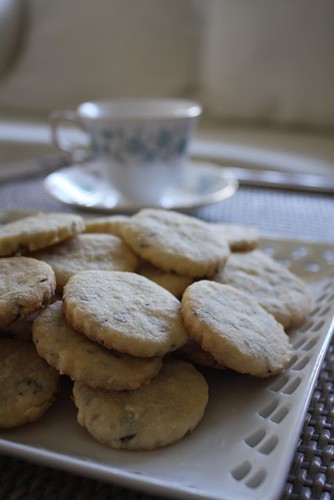
Caraway Biscuits
  • 2 cups plain flour
  • 1 pinch salt
  • 100g butter, chopped and at room temperature
  • 1 1/4 cups caster sugar
  • 1 egg, beaten
  • 2 tab milk
  • 2 tab caraway seeds

Preheat the oven to 150 degrees (celcius) and grease baking trays.

Sift the flour and salt into a large bowl. Rub in the butter. Add the sugar and stir through evenly. Make a well in the center and then add the beaten egg, seeds and enough milk to make a stiff dough.

Roll the dough out on a floured surface until approx. 5mm thin. Cut cookies out and place them on the baking trays.

Bake in the oven for 20 - 25 minutes, turning the tray once for even baking.

Remove from trays and cool on a rack making sure to eat at least one fresh and piping hot from the tray.


These biscuits go very firm so if you prefer a less brittle cookie, eat them warmed up as they soften again beautifully.

Lastly, a word of caution on wildly using caraway in random recipes: though caraway can be used in thick breads (I think it is actually an ingredient in rye bread), it doesn't like yeast so throwing this into your favourite bread recipe may create less than successful results.

Thursday, May 14, 2009

A Passion for Passionfruit

A coworker has a passionfruit vine that runs rampant in her back yard and every so often, tired of her rediculously fruitful crop, she brings passionfruits into work for her lucky workmates.

Last week she gave me 9 passionfruits and though I was stoked at getting so many for nothing more than a smile, I was a bit overwhelmed at what to do with them.

The last time she had given me 2 of the fruits and I had used their juicy pulp to make a passionfruit sauce to go over ice-cream. It was seriously tasty but I wanted to try something different. Something that was almost symbolic of my move to home-made life.


And looking through one of my favourite cookbooks Like Grandma Used to Make by Reader's Digest (which I was lucky enough to get 2nd hand at the Brisbane Lifeline Booksale for $15!) I saw recipes for cordials. It was like a light bulb went off above my head.

For my whole life cordial has always been bought from a supermarket. I always had the concept that cordial was some thing that could only be made in a factory with expensive machinery and mysterious secret ingredients. When I read Anne of Green Gables I learned that Marilla had home made cordials but it seemed like some long-lost art along with cheesemaking and fruit preserving. So deciding to make cordial felt liberating, like I was taking something back into the home where it had started.


The cordial recipe I used is below:

Passionfruit Cordial

  • 1 cup white sugar
  • 1/2 cups water
  • 1 cup lemon juice
  • 1 cup passionfruit pulp (seeds included)
  • kitchen muslin/gauze
  • soda water to serve.


Add the sugar, water and juice to a saucepan. Bring to the boil and, with lid off, continue to simmer until the liquid has become syrupy. Remove from heat and add the passionfruit pulp.

Set aside for 45 min or until cooled.

Using a strainer, separate the liquid from the pulp. Put the remaining pulp in a large square of kitchen muslin. Squeeze and massage out the liquid still captured in the pulp. Note: Be careful not to let seeds escape. I'd advise using two layers of muslin as mine split a little.

Store the cordial in a sterilised glass bottle in the fridge. Serve with soda water or water.

Tuesday, May 5, 2009

Bring on the Soup Weather!

Here in Brisbane the cooler weather has set in, bringing with it the perfectly clear, blue skies that seem to reach forever. When I lived in Japan I couldn't hack the Northern Hemisphere Winter for loss of those blue Winter skies I longed for back home.

Winter doesn't hit us hard in sub-tropical Queensland. There's maybe three or four weeks of rug-up-wear-your-coat weather but the rest of Winter is not so bad.

However, being the cold-frog that I am I enjoy snuggling into blankies, wearing flannel PJs and eating nice hot soup when this time of the year comes on.

So here is the soup I made last night!

Cauliflower, Leek and Capsicum Soup

1 tsp olive oil
1 clove garlic crushed
1 tsp ginger crushed
1 head cauliflower, broken into florets
1 capsicum (I used red), chopped roughly
1 leek - trimmed and sliced
1.5L (6 cups) chicken stock
1/4 tsp cumin powder
1- 2 pinches dried dill

Heat the oil in a large pan. Add garlic, ginger and leek, stirring until leek is tender. Add cauliflower and capsicum and stir over heat for 2 minutes. Add chicken stock, cumin powder and dill. Bring to the boil and simmer over medium heat for 30 minutes or until cauliflower is tender. Puree the soup in batches. Deliciously served with crusty bread and a sprinkling of grated cheese!

Thursday, April 30, 2009

Rice Pudding!

'What is the matter with Mary Jane?
She's crying with all her might and main,
And she won't eat her dinner - rice pudding again -

What
is the matter with Mary Jane?

What
is the matter with Mary Jane?
I've promised her dolls and a daisy-chain,
And a book about animals - all in vain -
What
is the matter with Mary Jane? ...

What
is the matter with Mary Jane?
She's perfectly well and she h
asn't a pain,
And it's
lovely rice pudding for dinner again!
What
is the matter with Mary Jane?'

A.A. Milne

Tonight it seems my brain and tummy had a hankering for rice that was not satisfied by the risotto I had reheated for dinner. After finishing a letter to post off to a friend I found myself putting a saucepan on the stove to make rice pudding for dessert.

Rice pudding is something I associate with my childhood when Mum or Grandma would make it for a Winter dessert and serve it piping hot. Perhaps it's the cool weather falling over Brisbane that made me want to try making it, admittedly for the first time. Then again, it might have been an excuse to make something with the rhubarb I bought at the markets last weekend! I've never cooked anything with rhubarb. Infact I've never eaten rhubarb at all!


Creamed Rice Pudding

(serves 3 -4 )
  • 2.5 litres milk
  • 1/4 cup castor sugar
  • 2tsp vanilla essence
  • 1 cup white rice (I used long grain)
Combine milk, sugar and essence in a medium saucepan. Bring to boil, stirring, over medium heat.
Gradually add rice, stirring. Reduce heat to low and over with a tight fitting lid. Simmer over low heat for 25 minutes stirring occasionally.


Mushy Rhubarb

  • 3 sticks of rhubarb
  • 1/4 cup castor sugar
  • 1 tsp lemon juice
  • 1 tsp cornflour mixed in 2 tbs water.
Put rhubarb, sugar and juice in a small saucepan. Stir over low heat for 5 or so minutes until rhubarb has gone tender. Add the combined cornflour and water and stir through. Remove from heat and serve over ice cream, rice pudding, in a crumble, on waffles.... so many tasty uses!

For a first attempt at rice pudding it was very satisfying and as I sat eating it at the kitchen table in my flanellette PJs I felt like a kid again. I almost looked over my shoulder, expecting Mum to be there, scolding me for not wearing slippers on the chilly floor...

As for the rhubarb, I really enjoyed the flavour, especially mixed with the tartness of the lemon juice. I felt concerned at first that the sugar and small amount of lemon juice would burn or turn to toffee at the bottom of the pan but the rhubarb seemed to shed water as it cooked, especially when I turned the heat up to medium. I'll definitely be buying rhubarb again!